If you want to read the entire series from the start, please follow these links:
Getting Started
HDTV Graphics: Getting Organized
Find out the format -
Before you start any graphics project, find out what format you'll be working in. Whether it's 1920x1080, 1280x720 or 3840x2160 (4K UHD), you must work in that resolution in order to have the best looking images. You'll also need to make sure you're using the correct Photoshop preset along with pixel aspect ratio and color space for whatever resolution you'll be working in. Yes I know this all seems rather daunting, but no worries, I'll be covering all this so you won't have to scour the web looking for the information.
Photoshop presets -
There is quite a bit of debate out in the graphics world on what Photoshop Preset to use verses what codec, format and/or resolution you're working in. My belief, is you need to set up Photoshop to work in the codec standard you'll be using, as well as the resolution you'll be viewing it on. Now I know that sounds a bit confusing, but if I'm adding graphics to a video that is DVCProHD 1080p, then I need to make sure I'm using that Preset in Photoshop because the Pixel Aspect Ratio is 1.5 (rectangular pixels), even though I'll be viewing it later on a TV. However, if I'm not working with any pre-shot video and I'm creating graphics directly for viewing in 1920x1080. Or say if those graphics are later added to live video that is 1920x1080 and/or is going to be saved as an MP4 file, then I would select the HDTV 1080p Preset because the Pixel Aspect Ratio is 1:1 (square pixels). You would also use these same settings if you were adding graphics to a video that was saved in MP4 format.
Getting Started -
So the first thing you need to do is choose Film/TV from the New Document Preset options (figure 1), then select the correct Size you'll need from the drop-down menu. Since I normally work creating graphics for 1920x1080p live video, I select HDTV 1080p/29.97 as my Size. Doing this ensures that my image is the correct size, resolution (TV graphics are 72 dpi) and the right Pixel Aspect Ratio (in this case Square Pixels) for what my graphic will be added to.
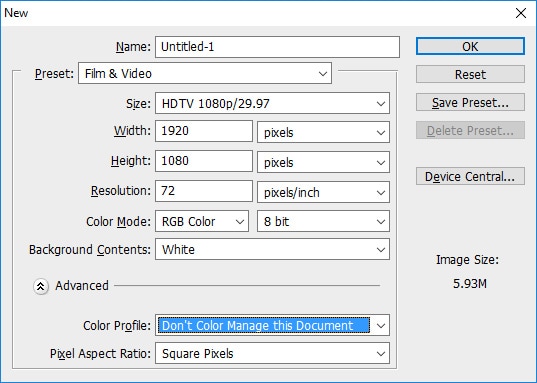
Figure 1
Background and Color Profile -
Next you'll want to select Transparent for the Background Contents (figure 2). Some graphic artists just leave this at the default color of white. I like to work with a transparent background because it gives me more options later when editing. Next select your Color Profile, and since we're working with HD, select HDTV (Rec. 709). Now would be a great time to save this Preset for later use. Select Save Preset and give your new preset a name. Now every time you need to create a graphic for this format, you just select your own Preset and away you go.
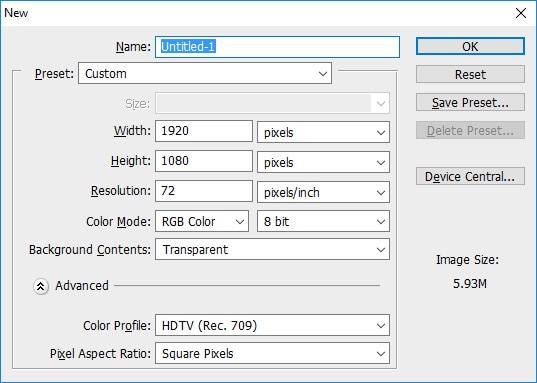
Figure 2
Now that you have your Preset saved it's time to select OK and see the results. It should look like Figure 3 below, however I purposely have the background set to white so we could see those cyan lines that your image doesn't have just yet. Those cyan lines represent HDTV Safe Zones. And we'll cover that discussion in my next post.
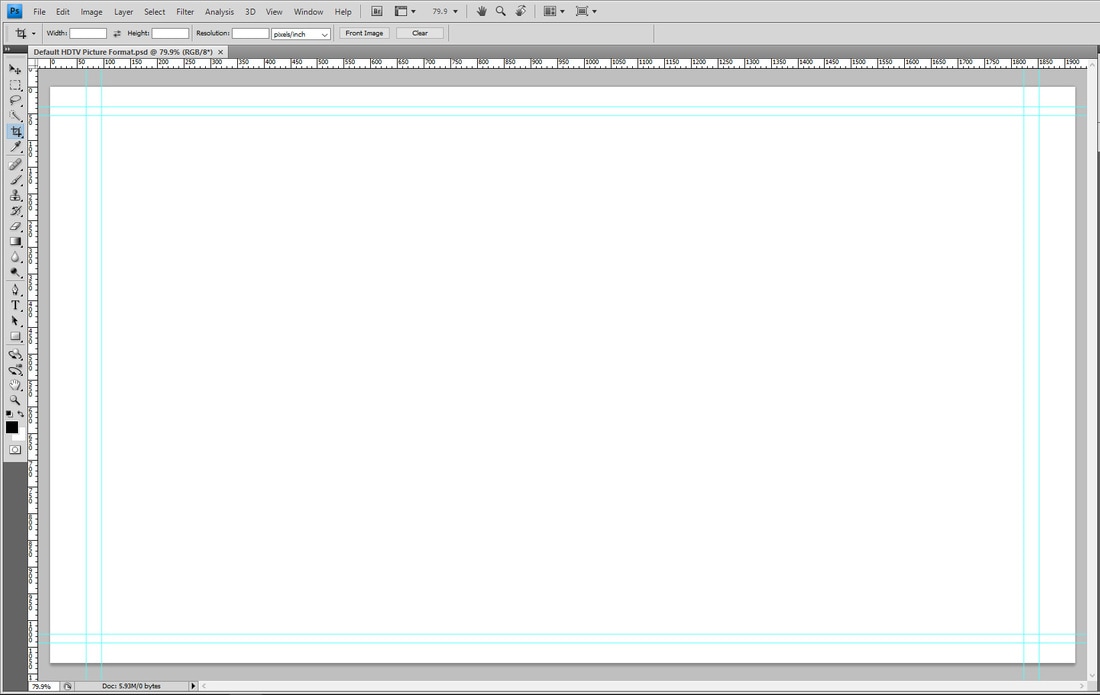
Figure 3
 RSS Feed
